2021. 11. 2. 18:14ㆍ강의 정리/노마드코더( 바닐라 JS 강의 )
핵심 : event를 설정할 수 있다.
. JS를 통해 HTML의 내용을 가져올 수 있다는 것은 app.js를 HTML에 연결한 덕분이다!
document가 HTML이 app.js를 load하기 때문에 존재하는 것임.
<body>
    <div class="hello">
        <h1>Grab me!</h1>
    </div>

    <!-- 자바 스크립트 연결 -->
    <script src="app.js"></script>
</body>
. console.dir을 사용하면 object로 표시한 element를 보여줌.

. 위 항목들은 전부 JS object임.
이는 object 내부에 있는 property들의 값을 변경할 수 있다는 것을 의미함.

. 위 사진의 style을 보면, js형식으로 작성되어 있음. 이는 js에서 변경할 수 있음을 의미함.
const hellos = document.querySelector("div.hello:first-child h1");

hellos.style.color="blue";
. JS에서 대부분 작업할 일은, event를 listen 하는 것임.
event란 내가 click을 하거나, wifi에서 접속이 해제되는 경우등이 event가 될 수 있다.
. click event
1. HTML element를 JS로 가지고 온다.
2. event를 listen한다.
3. event가 일어났을 때의 function을 정의해준다.
4. 정의한 function을 event listener의 두번째 인수로 전달해준다.
const hellos = document.querySelector("div.hello:first-child h1");

function handleTitleClick() {
    console.log("title was clicked!");
}

hellos.addEventListener("click", handleTitleClick);

. funtion을 바로 실행하지 않는 이유(괄호를 넣지않는 이유)는 우리가 원하는 것은 유저가 click을 할 경우에, JS가 우리 대신 실행버튼을 눌러주길 원하기 때문이다.
. 정리하면
1. page에서 element를 찾아오고
2. 그 element에 event listener를 추가하고
3. event를 listen하고, event에 반응을 함.
Events part Two
핵심 : event를 설정할 수 있다.
. listen 하고 싶은 event를 찾는 가장 좋은 방법은, 구글링 하는 것이다.
https://developer.mozilla.org/en-US/docs/Web/API/HTMLHeadingElement

. 또한 console.dir()을 통해 listen 하고 싶은 event를 찾을 수도 있음.

. onmouseenter라고하는 event는 마우스가 title위에 위치할 때의 event이다.
const hellos = document.querySelector("div.hello:first-child h1");

function handleTitleClick() {
    console.log("title was clicked!");
}

function handleMouseEnter(){ // 마우스가 위에 위치하면, element를 gray색으로 바꿔줘
    hellos.style.color="gray";
}

hellos.addEventListener("click", handleTitleClick);
hellos.addEventListener("mouseenter", handleMouseEnter);

. onmouseleave라고하는 event는 마우스가 title위에서 벗어났을때의 event이다
const hellos = document.querySelector("div.hello:first-child h1");

function handleTitleClick() {
    console.log("title was clicked!");
}

function handleMouseEnter(){ // 마우스가 위에 위치하면, inner Text 변경
    hellos.innerText="마우스가 여기있어요!!!";
}

function handleMouselLeave(){ // 마우스가 위에서 벗어나면, inner Text 변경
    hellos.innerText="마우스 여기 없어요ㅠㅠㅠ";
}

hellos.addEventListener("click", handleTitleClick);
hellos.addEventListener("mouseenter", handleMouseEnter);
hellos.addEventListener("mouseleave", handleMouselLeave);
. JS로도 style을 변경할 수 있으나, style을 변경하는 것은 css로 하는게 좋다.
Events part Three
핵심 : 더 많은 event를 설정할 수 있다.
. 여러가지 event를 listen하는 방법이 있음.
. 첫번째는 우리가 위에서 살펴본 방법임.
1. page에서 element를 찾아오고
2. 그 element에 event listener를 추가하고
3. event를 listen하고, event에 반응을 함.
. 두번째 방법은 아래 코드와 같음.
const hellos = document.querySelector("div.hello:first-child h1");

function handleTitleClick() {
    console.log("title was clicked!");
}

hellos.addEventListener("click", handleTitleClick);

위의 코드를 아래와 같이 바꿀 수 있음.

hellos.onClick = handleTitleClick;
그러나 위의 코드를 더욱 선호하는 이유는 나중에 removeEventListener를 통해서 event listener를 제거할 수 있기 때문이다.
. window : 말 그대로 웹사이트의 창을 의미함.
window 또한 event를 listen 할 수 있음.
const hellos = document.querySelector("div.hello:first-child h1");

function handleTitleClick() {
    console.log("title was clicked!");
}

function handleMouseEnter(){ // 마우스가 위에 위치하면, inner Text 변경
    hellos.innerText="마우스가 여기있어요!!!";
}

function handleMouselLeave(){ // 마우스가 위에서 벗어나면, inner Text 변경
    hellos.innerText="마우스 여기 없어요ㅠㅠㅠ";
}

function handleWindowResize() {
    document.body.style.backgroundColor = "tomato";
}

hellos.addEventListener("click", handleTitleClick);
hellos.addEventListener("mouseenter", handleMouseEnter);
hellos.addEventListener("mouseleave", handleMouselLeave);

// h1이 아닌 window element의 resize event를 listen하는 것
window.addEventListener("resize", handleWindowResize);
. resize event는 참고로 화면 크기를 변경(축소, 확대) 했을 때 일어나는 event입니다.
. h1은 document.title과는 완전히 다르다. body, head, title 태그의 경우 document에서 중요하기에 디폴트로 존재해서,
데려올 수 있는 것들이고, 나머지 element들은 querySelector로 가져와야한다.


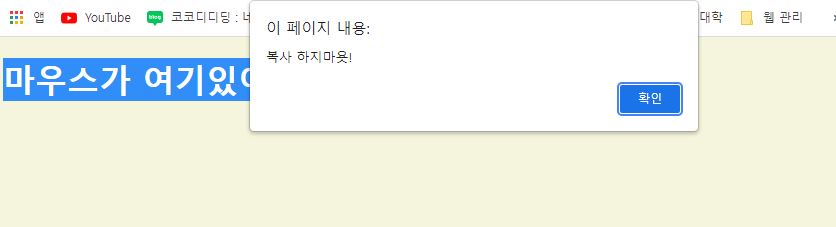
. copy event는 유저가 copy 행위를 하는 것을 감지 했을 때 일어나는 event이다.
const hellos = document.querySelector("div.hello:first-child h1");

function handleTitleClick() {
    console.log("title was clicked!");
}

function handleMouseEnter(){ // 마우스가 위에 위치하면, inner Text 변경
    hellos.innerText="마우스가 여기있어요!!!";
}

function handleMouselLeave(){ // 마우스가 위에서 벗어나면, inner Text 변경
    hellos.innerText="마우스 여기 없어요ㅠㅠㅠ";
}

function handleWindowResize() {
    document.body.style.backgroundColor = "tomato";
}

function handleWindowcopy() {
    alert("복사 하지마욧!");
}

hellos.addEventListener("click", handleTitleClick);
hellos.addEventListener("mouseenter", handleMouseEnter);
hellos.addEventListener("mouseleave", handleMouselLeave);

// h1이 아닌 window element의 resize event를 listen하는 것
window.addEventListener("resize", handleWindowResize);
window.addEventListener("copy", handleWindowcopy);
. offline event와 online event는 현재 wifi에 접속 중이 아니거나 접속 중임을 감지 했을 때 일어나는 event이다.
const hellos = document.querySelector("div.hello:first-child h1");

function handleTitleClick() {
    console.log("title was clicked!");
}

function handleMouseEnter(){ // 마우스가 위에 위치하면, inner Text 변경
    hellos.innerText="마우스가 여기있어요!!!";
}

function handleMouselLeave(){ // 마우스가 위에서 벗어나면, inner Text 변경
    hellos.innerText="마우스 여기 없어요ㅠㅠㅠ";
}

function handleWindowResize() {
    document.body.style.backgroundColor = "tomato";
}

function handleWindowcopy() {
    alert("복사 하지마욧!");
}

function handleWindowOffline() {
    alert("SOS no WIFI");
}

function handleWindowOnline() {
    alert("ALL GOOD");
}


hellos.addEventListener("click", handleTitleClick);
hellos.addEventListener("mouseenter", handleMouseEnter);
hellos.addEventListener("mouseleave", handleMouselLeave);

// h1이 아닌 window element의 resize event를 listen하는 것
window.addEventListener("resize", handleWindowResize);
window.addEventListener("copy", handleWindowcopy);
window.addEventListener("offline", handleWindowOffline);
window.addEventListener("online", handleWindowOnline);
요약
1. JS를 통해 HTML의 내용을 가져올 수 있다는 것은 app.js를 HTML에 연결한 덕분이다!
2. JS에서 대부분 작업할 일은, event를 listen 하는 것임
3. click event
{
1. HTML element를 JS로 가지고 온다.
2. event를 listen한다.
3. event가 일어났을 때의 function을 정의해준다.
4. 정의한 function을 event listener의 두번째 인수로 전달해준다.
}
4. JS로도 style을 변경할 수 있으나, style을 변경하는 것은 css로 하는게 좋다.
5. h1은 document.title과는 완전히 다르다. body, head, title 태그의 경우 document에서 중요하기에 디폴트로 존재해서, 데려올 수 있는 것들이고, 나머지 element들은 querySelector로 가져와야한다.
'강의 정리 > 노마드코더( 바닐라 JS 강의 )' 카테고리의 다른 글
| 동백 // 노마드 코더 바닐라JS: Weather (0) | 2021.11.12 |
|---|---|
| 동백 // 노마드 코더 바닐라JS: CLOCK (0) | 2021.11.05 |
| 동백 // 노마드 코더 바닐라JS: Login (0) | 2021.11.04 |
| 동백 // 노마드 코더 바닐라JS: CSS와 JS (0) | 2021.11.03 |
| 동백 // 노마드 코더 바닐라JS: HTML과 JS (0) | 2021.11.02 |